Certain SQL Server permissions are necessary for AYS users to access the data and run reports. This article will assist you in configuring the security on recent versions of Microsoft SQL Server.
At Your Service Software, Inc. will not provide support for installing or administering SQL Server on your hardware and network. Please consult a local IT service provider and/or Microsoft for this service.
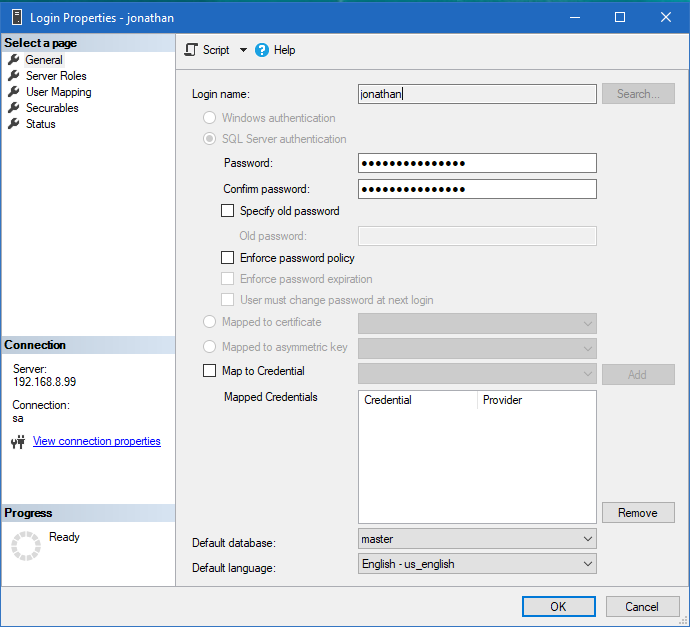
Step 1. Create a new login
Launch SQL Server Management Studio and create a new login, or create the user using T-SQL CREATE LOGIN statements. The screenshots to follow will use SQL Server authentication for illustrative purposes, you may use either Windows Authentication or SQL Server authentication.
Step 2. Grant rights to create databases to the new user
At least one new user will need rights to create databases so that AYS can construct the correct database structure. Select dbcreator from the “Server Roles”. This will not be necessary for users to simply connect to the database and enter or edit information.
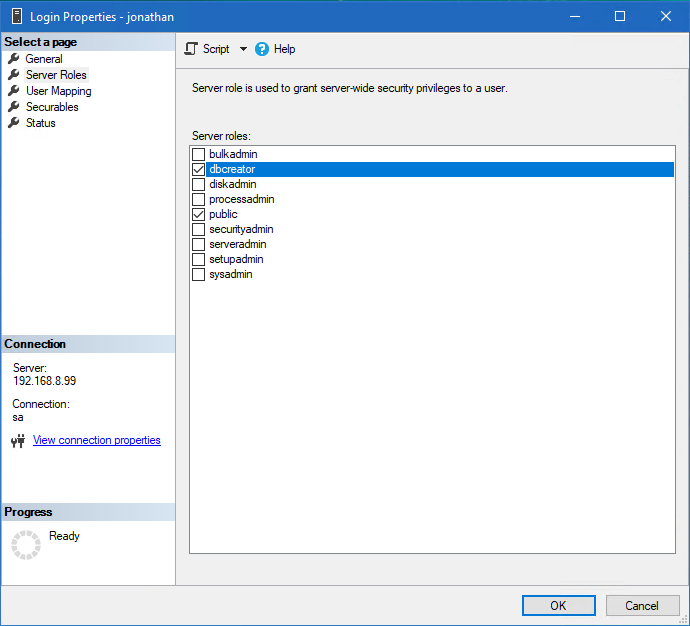
This can instead be done using T-SQL with the following command:
EXEC sp_addsrvrolemember <newusername>, dbcreator;
Step 3. Grant “View Server State” rights to the new user
AYS concurrent user licensing requires each user have “View Server State” rights to function correctly. First, search the server objects and add the server in the securables section.
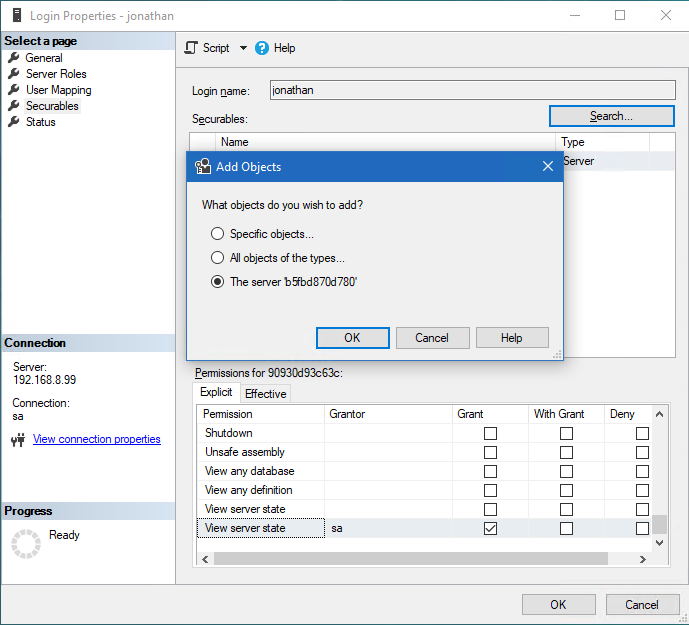
Once it has been added, select the server in the list and grant “View server state” at the bottom section of the same window.
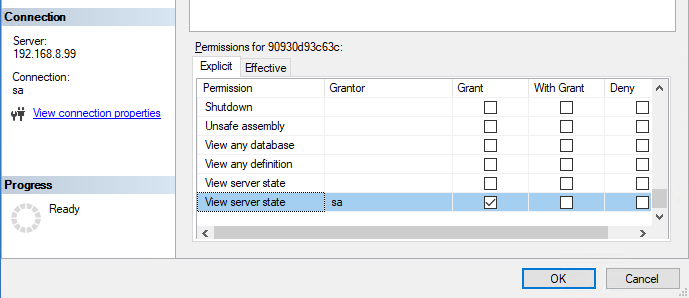
This can also be added via T-SQL using the following command, if you prefer:
GRANT VIEW SERVER STATE TO <newusername>;
Step 4. Create the AYS database
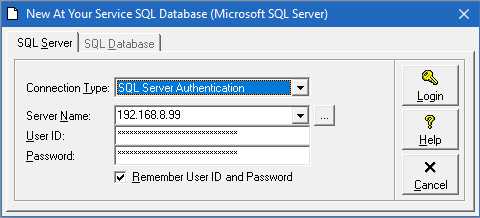
Open AYS and select File – New Database – Empty Microsoft SQL Server Database… enter your SQL Server login information. User ID and password will be obscured with asterisks.
If you have an existing Access database, you can instead choose File – New Database – Import AYS Database to New Microsoft SQL Server Database.
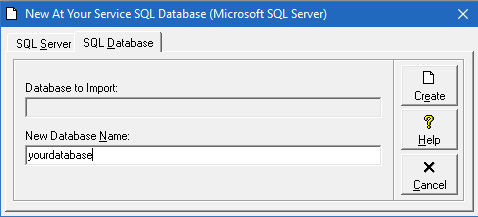
Click Login and choose a database name. When you click “Create” the database should be created on the server.
The new database will be created on the server with an automatic prefix of AYS_, so the database named “yourdatabase” can be found on the server as “AYS_yourdatabase”.
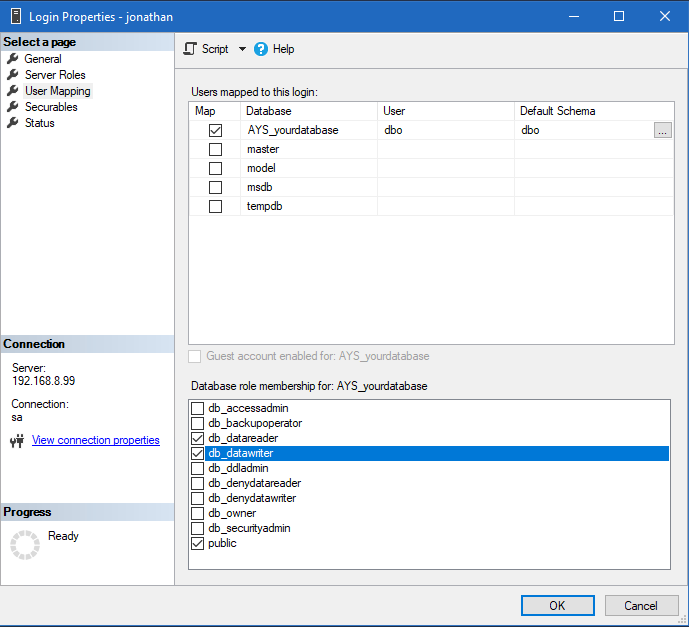
5. Grant basic database rights to all the users
The user ID used to create the database will be the database owner (dbo) and will have all the rights necessary on the SQL database. For other users, you will need to go into their login properties and choose “User Mapping”, select the database and choose “db_datareader” and “db_datawriter“. You will also need to grant the “View server state” permission as described in step 3 above.
These are the equivalent T-SQL commands:
USE AYS_yourdatabase;
CREATE USER <newusername> FROM LOGIN <newusername>
ALTER ROLE db_datareader ADD MEMBER <newusername>
ALTER ROLE db_datawriter ADD MEMBER <newusername>
GO
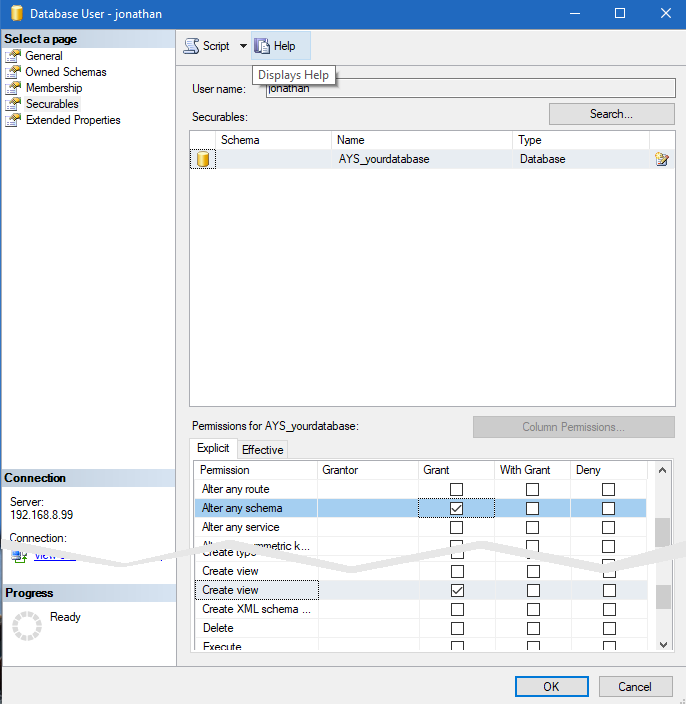
Next, set database permissions for each user so they can create and alter views. Click on Securables and search for the database in the objects. Grant the “Alter any schema” and “Create view” permissions to this user:
These are the equivalent T-SQL commands:
USE AYS_yourdatabase;
GRANT CREATE VIEW TO <newusername>
GRANT ALTER ANY SCHEMA TO <newusername>
GO
Repeat this step for every user you are granting permissions on the server. If you are familiar with SQL Server, you can create a server role with the necessary permissions and add users to this role. A detailed description of this is beyond the scope of this document, please see your local IT consultant for instructions on how to do this.
0 people found this article useful
0 people found this article useful