The following are a few steps you should take to get started with a new AYS Repair Center installation.
When you first launch AYS, if prompts you for an Administrator login – to begin with, just leave the password field blank and click “Login”, you can set up a more secure password later if you wish.
AYS will then open a sample database for a fictitious camera company. This database is just to allow you to familiarize yourself with the application, and not for day-to-day use. To begin setting up for your own business, first close this database by closing the Repair Order browse if it is open, then select “File – Close Database” on the menu.
Create a new database
Next, click File – New Database – Empty AYS (Microsoft Access) Database… and choose a filename for your new database. If you are going to have multiple users using the database, then check the article about setting up AYS for multi-user access. If you have the Enterprise edition, you can choose the appropriate SQL database you are running instead of creating a Microsoft Access database.
Enter your company information
Business Location
Once your database is created, enter your business information under Setup – Business Locations. Your business name is read-only on this form as it is encoded in your license file. You can set up multiple business locations here, and each record includes its address information, as well as the following:
Number series
Each Customer, Vendor, Repair Order, Sales Invoice and Purchase Order has a separate number series by default, you can configure the range and series starting point as well as whether you wish to share the numbers across these different types of records.
Options
Here you can enter your business registration information, as well as some other reference information that is related to this business location.
Logo
Choose your business logo (in JPEG format) that you wish to have included on your reports as well as on the RepairStatus.net uploaded web page.
Data import and setup
You can choose to import or manually enter setup and lookup data in to your system. To manually set up the information, Click Setup – Lists and choose any of the following.
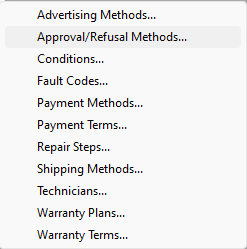
You will see a screen for entering each of these items. To get started quickly, you may want to first set up Payment Methods, Payment Terms and Technicians.
Many of these lists can be filled with information you have entered on Repair Orders. If you prefer, you can set up only the very minimum amount of information and as you use the application, you can later fill these lists with the data you practically use from day-to-day. Once these lists are filled, you can select the values when entering the Repair Orders and other forms. This will help make your data entry values more consistent.
Importing lists
If you have this information in a file in CSV (comma separated value) format, you can import the data by selecting Import – From Text File… and select one of the above lists from the menu.
Taxes
Tax information should next be one of the first things you do when configuring AYS. Click on Setup – Taxes and configure up to three taxes for your company. If you have a tax registration number, you should enter it here, as well as tax rates for the states or provinces you collect taxes for.
More detailed information about tax rates and rules can be found in this article.
Customers, Vendors and Inventory
The Customers, Vendors and Inventory can be imported from a CSV file if you already have some of that data available.
Customers are related to Repair Orders and Invoices. If you have “walk-in” customers that don’t require account, billing or warranty information, you can enter them in the forms as the “Miscellaneous” customer. Name and address information will be retained, so even a repeat customer’s information is easy to recall on new records.
Vendors can either be parts vendors or service vendors. You can assign a vendor as the source within Purchase Orders as well as Inventory items to streamline part orders. In Repair Orders you can assign a service vendor as a subcontractor to perform the repair as part of your process.
Inventory contains stock, detail and pricing information for the parts you have on hand or commonly use in your repair process.
Users
If you want to set a password for the currently logged in user – such as Administrator, click on User – Change Password. Enter the current password (which may be blank if you are just getting started) and enter and verify a new password. If you lose the administrator password, you can click on User – Recover Administrator Password and AYS Support will be notified you need to recover this password.
For your security, AYS Support will only provide the Administrator password to the user that is registered as the primary contact on file.
If you have a few users that use AYS, you can give them individual logins and permissions for the database, instead of allowing them to all use the “Administrator” login. Select User – User Security to configure login name, password, defaults and permissions for each AYS user login.
0 people found this article useful
0 people found this article useful