At Your Service has been tested on the Amazon AWS Lightsail platform. This allows you to run the At Your Service – Repair Center software and database server fully in the cloud, with only minimal client hardware.
The following are basic steps to set up an AWS Lightsail server and get started:
At Your Service Software, Inc. does not provide support for installing, administering, or securing cloud-hosted servers as described in this article. Please consult a local IT service provider, Amazon and/or Microsoft for this service.
Setting up a Windows server instance
Create an account and profile with Amazon at https://lightsail.aws.amazon.com
On your dashboard you should see a blank work area, with no instances created, and some tabs along the top.
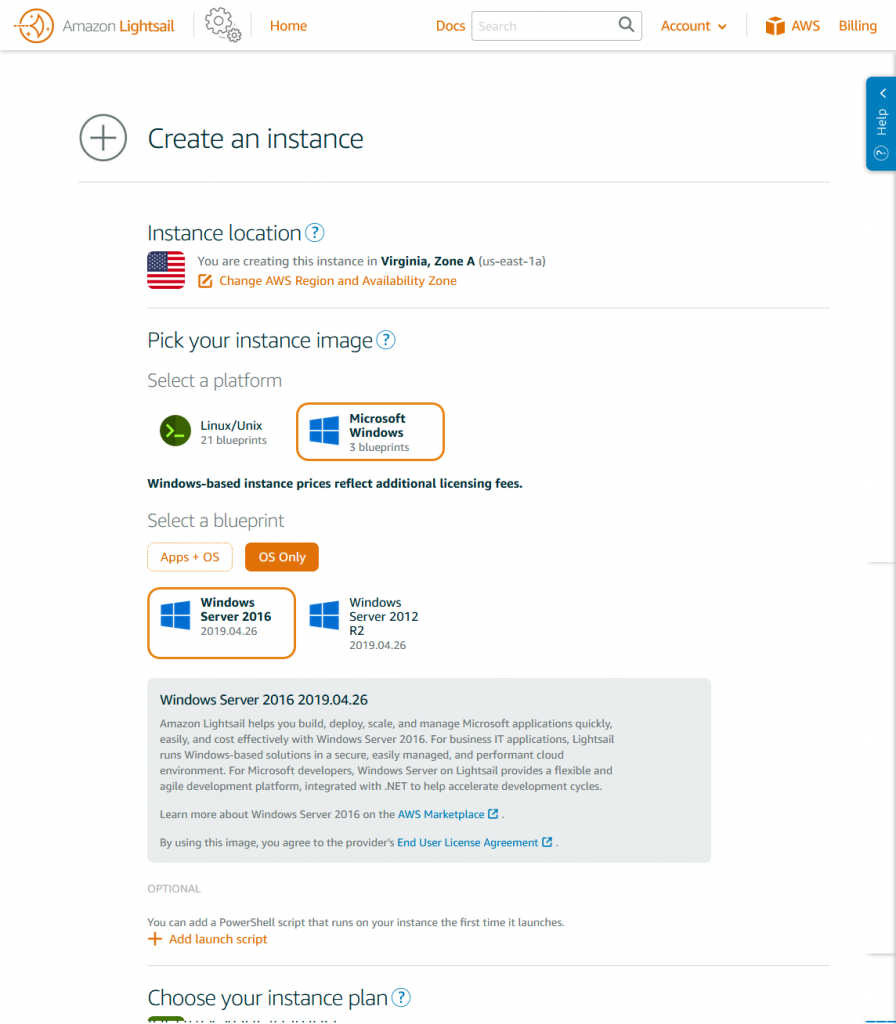
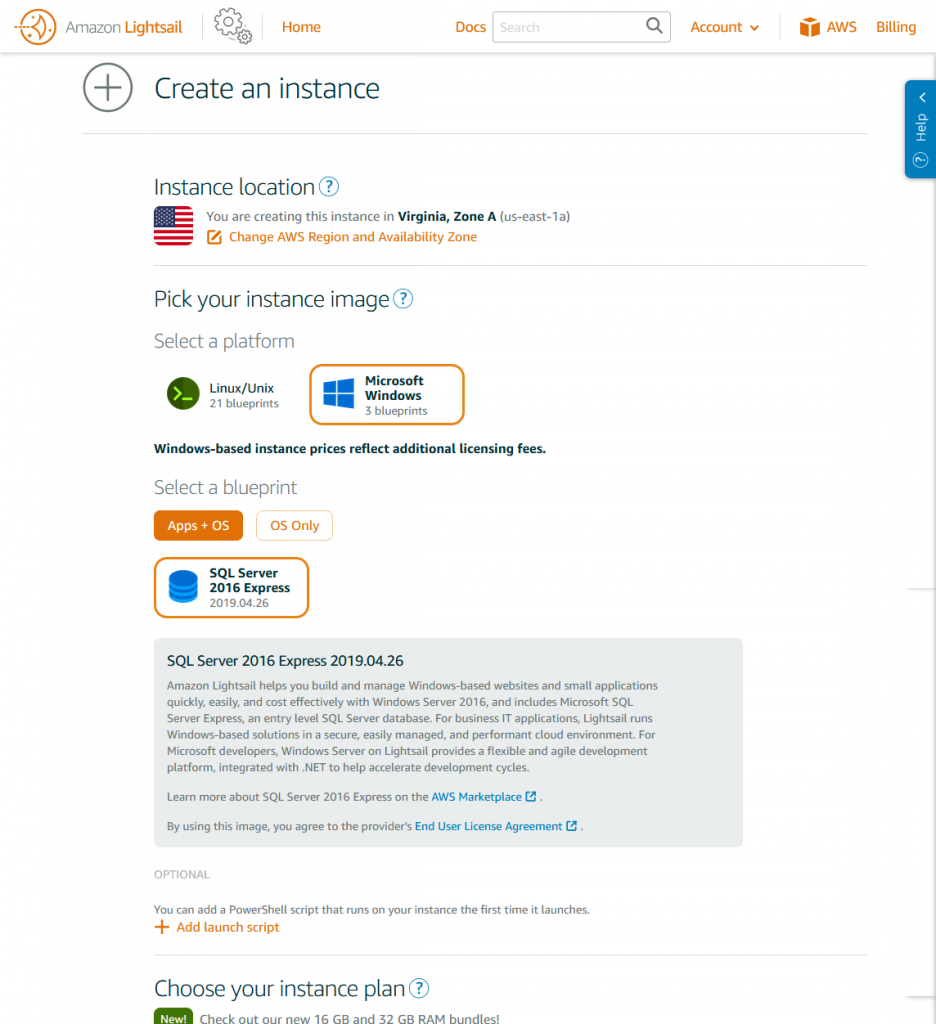
Click on “Create an Instance” to create a Windows Server to run AYS.
Select the zone closest to your geographic area. Please note that all servers you create (database and Windows Remote Desktop host) should be located in the same zone.
Choose “Microsoft Windows” and choose the “OS Only” blueprints. Select “Windows Server 2016”
Choosing a Windows server instance plan
As of mid 2019, AYS Lightsail is offering several tiers of server. Here are some suggested configurations:
| RAM | CPU | Storage | Transfer |
| 4 GB | 2 vCPU | 80 GB SSD | 4 TB |
| 8 GB | 2 vCPU | 160 GB SSD | 5 TB |
| 16 GB | 4 vCPU | 320 GB SSD | 6 TB |
| 32 GB | 8 vCPU | 640 GB SSD | 7 TB |
While some lower end servers are available, the minimum suggested tier to run AYS well is the 4 GB + 2 vCPU tier. It has been tested with 10 simultaneous user sessions. Note, any additional applications and workloads run by the server in addition to AYS will likely require higher powered instances.
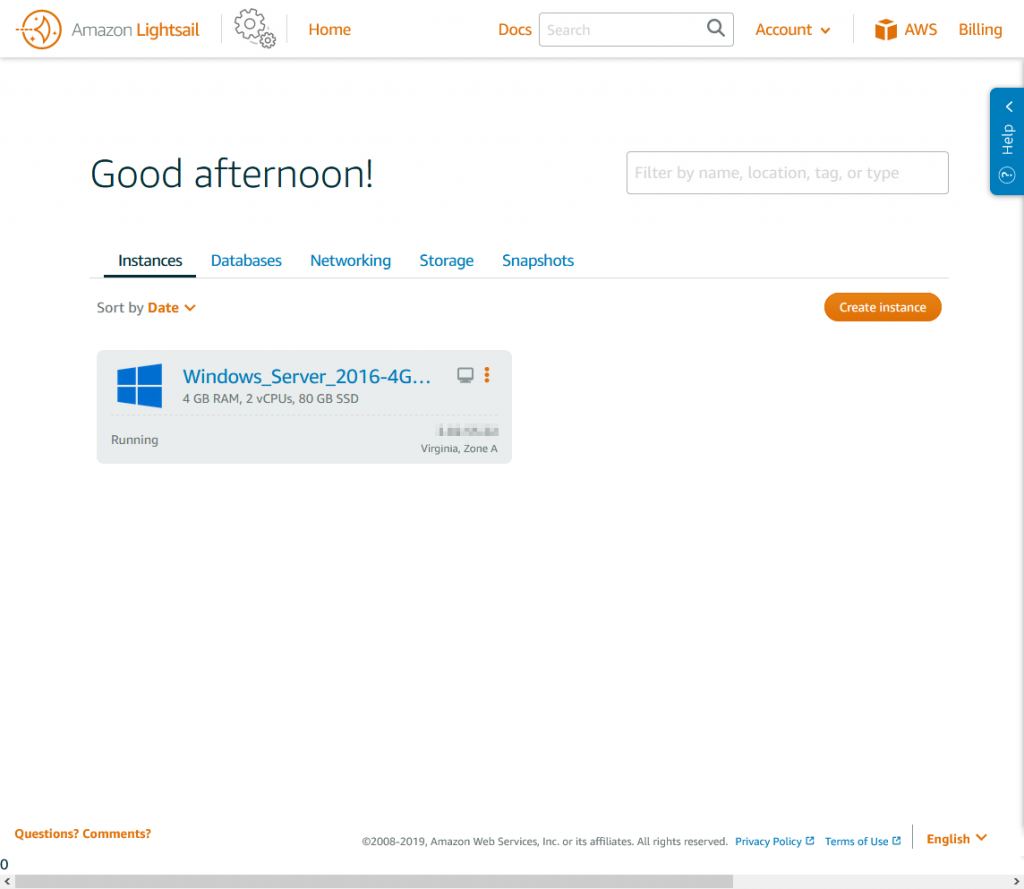
Click “Create instance” and you will be returned to the dashboard. AWS will create and provision your server over the next few minutes.
Set up your server
Click on the server name in your instance screen.
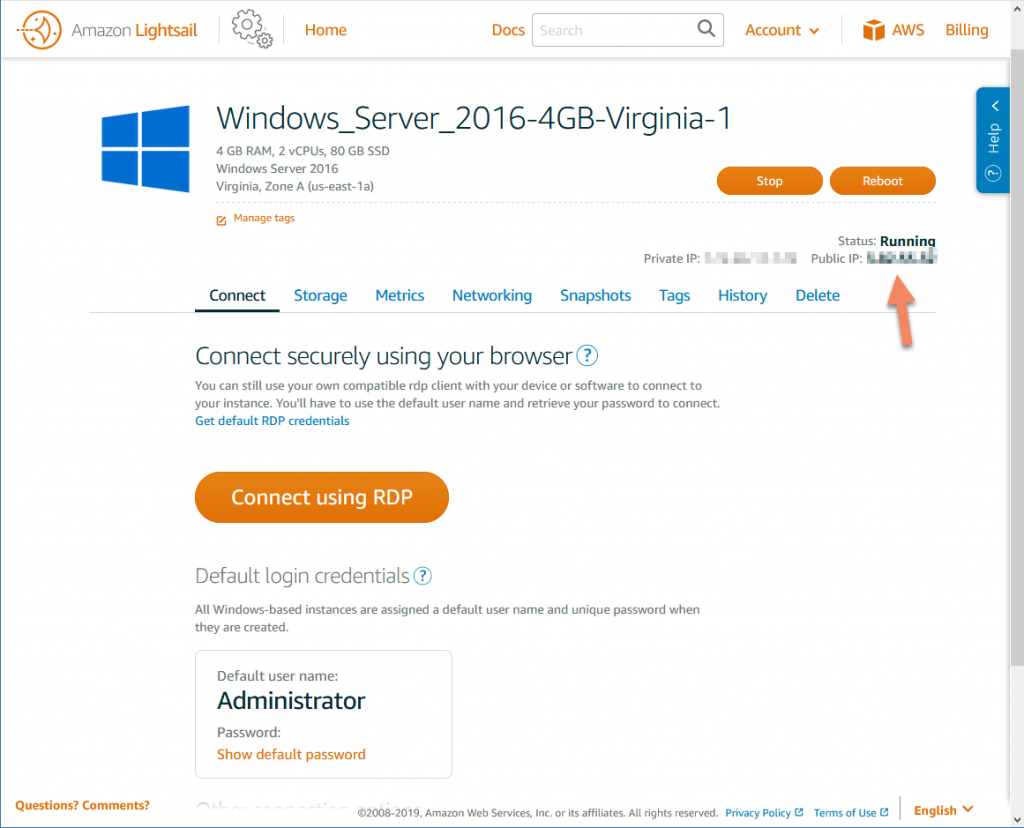
You can connect to the instance using the orange button, or using the Remote Desktop Client installed on your local machine.
If you use the RDP client, connect to the Public IP address in the upper right as shown by the arrow. This address will change when the instance is stopped and restarted, but you can create a static IP for the instance using the Lightsail Dashboard “Networking” tab.
Click on “Show default password” to see the complex password automatically generated for your instance.
Log on as Administrator using the provided password.
You may configure and administer your server for AYS as you would a local machine.
As Administrator, you should do the following:
- Create Users
- (optional) Create a Local group for AYS users
- Install AYS via the installer and grant permission to AYS folder
- Install database connector drivers if required
- Set up and configure a SQL server instance
- Install other software, such as Quickbooks or PDF applications
Setting up a database instance
You can use either MySQL or Microsoft SQL Server servers hosted on the Lightsail services. While it is technically possible to connect to other services (such as EC2 RDS) from the Lightsail Windows Server, only Lightsail hosted servers will be discussed here.
You can either create a managed or unmanaged (self-administered) server on the platform. MySQL is available in both cases but Microsoft SQL Server is available only as an unmanaged server. Managed servers are pre-configured and have automatic backup and update solutions in place.
Managed database (MySQL)
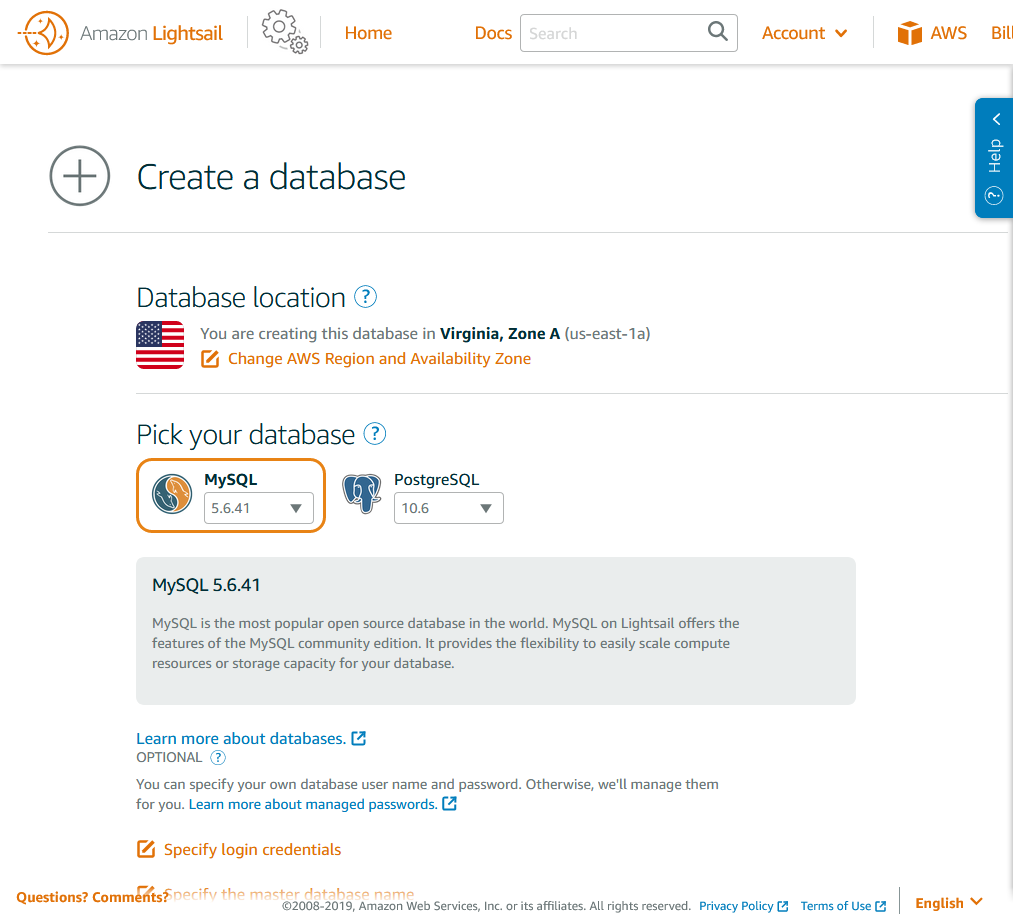
Select the Lightsail dashboard and choose the Databases tab
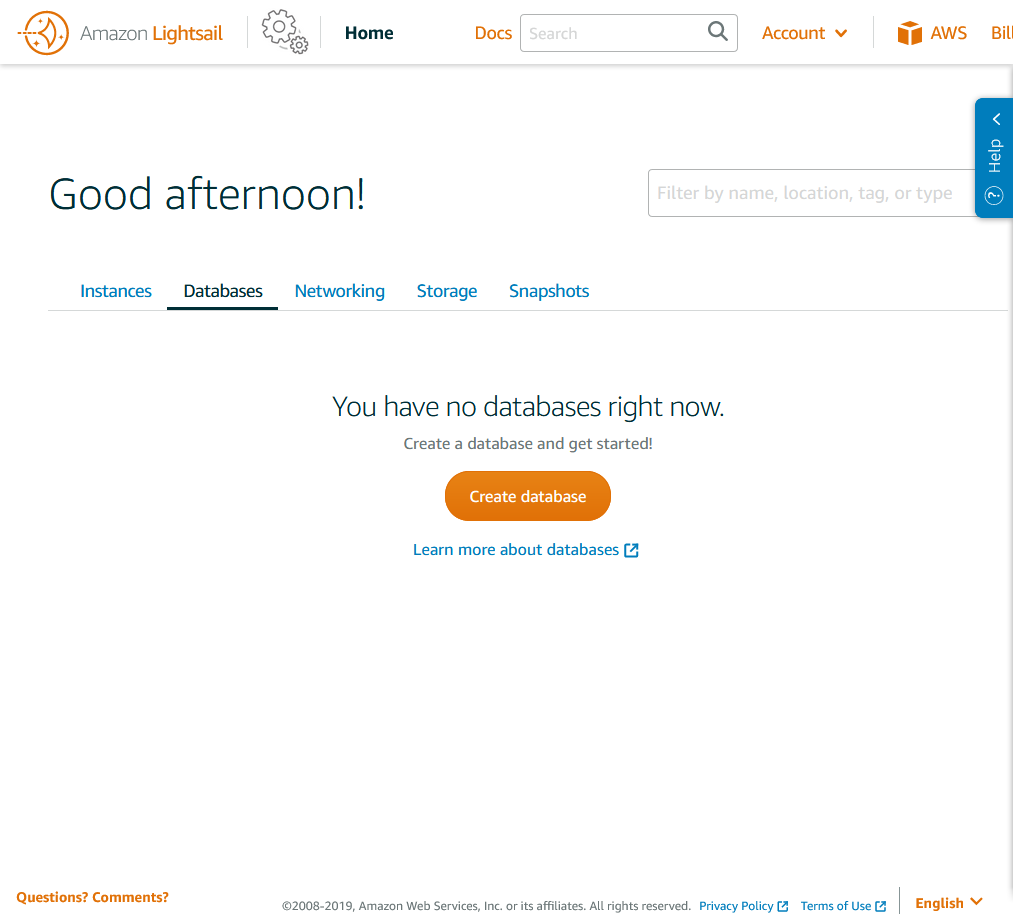
Click the “Create instance” button
MySQL has been tested on AWS Lightsail and is supported with both version 5.x and 8.x. Please see this article for more details about MySQL compatible versions. Note that PostgreSQL is not supported by AYS.
Choose an instance according to your expected client load and budget. Here are some of the available tiers at the time of this writing:
| RAM | CPU | Storage | Transfer |
| 1 GB | 1 vCPU | 40 GB SSD | 100 GB |
| 2 GB | 2 vCPU | 80 GB SSD | 100 GB |
| 4 GB | 4 vCPU | 120 GB SSD | 100 GB |
| 8 GB | 8 vCPU | 240 GB SSD | 200 GB |
The smallest 1 GB, 1 vCPU Managed MySQL server has been tested with 10 simultaneous user sessions, and performs well.
Click on the database once it has been provisioned and you will see a screen like this
Note the endpoint and the “dbmasteruser” password generated by the server. Within your Windows (AYS) server, you can install the MySQL Workbench and use this information set up users in order to create and access your server.
You can create a System DSN with this information as Administrator, and all users will be able to use it to connect to the database.
Self-administered database (MySQL or MS SQL Server Express)
You can create an instance with a Linux or Windows host and manually install MySQL if you wish some capability that is not included in the managed database. You can also install MS-SQL Server (Standard or Enterprise) in a Windows instance. These options are not described here.
If you wish Microsoft SQL Server express the options provided at this time are:
| RAM | CPU | Storage | Transfer |
| 2 GB | 1 vCPU | 60 GB SSD | 3 TB |
| 4 GB | 2 vCPU | 80 GB SSD | 4 TB |
| 8 GB | 2 vCPU | 160 GB SSD | 5 TB |
| 16 GB | 4 vCPU | 320 GB SSD | 6 TB |
| 32 GB | 8 vCPU | 640 GB SSD | 7 TB |
Choose the Microsoft Windows blueprints, and the “Apps + OS” blueprint option.
You will have to follow a similar process as above in setting up the Windows server in order to run the SQL Express server.
Setting up remote desktop server
This section describes only basic Remote Desktop (Terminal Server) setup. It is much better to set up a Remote Desktop Gateway server and implement stronger security policies to keep your server and information safe.
Windows Server includes 2 CAL (client access licenses) to connect to the server for administrative use. You will have to purchase and install licenses for the users you want to connect to the server.
Configuring and Promoting the Server to an Active Directory Domain Controller
In order to use Remote Desktop Licensing and configure the Remote Desktop Server using “Quick Start” you must either promote the server to a Domain Controller using the instructions below or join the server to your existing Active Directory forest.
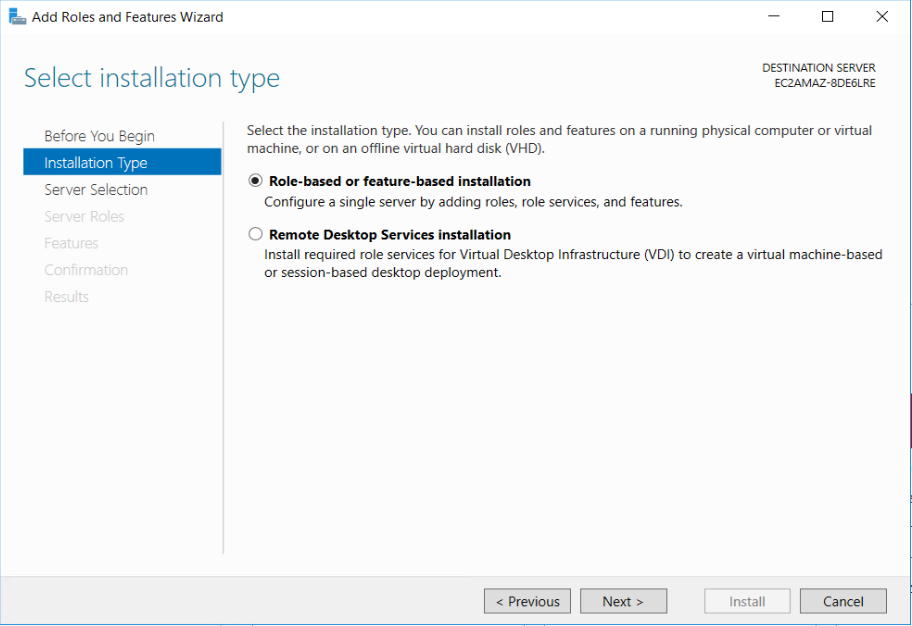
Click on the Start menu and launch the Server Manager. On the dashboard on the right, click “Manage” and choose “Add Roles and Features”

In the following Wizard, choose “Role-based or feature-based installation”
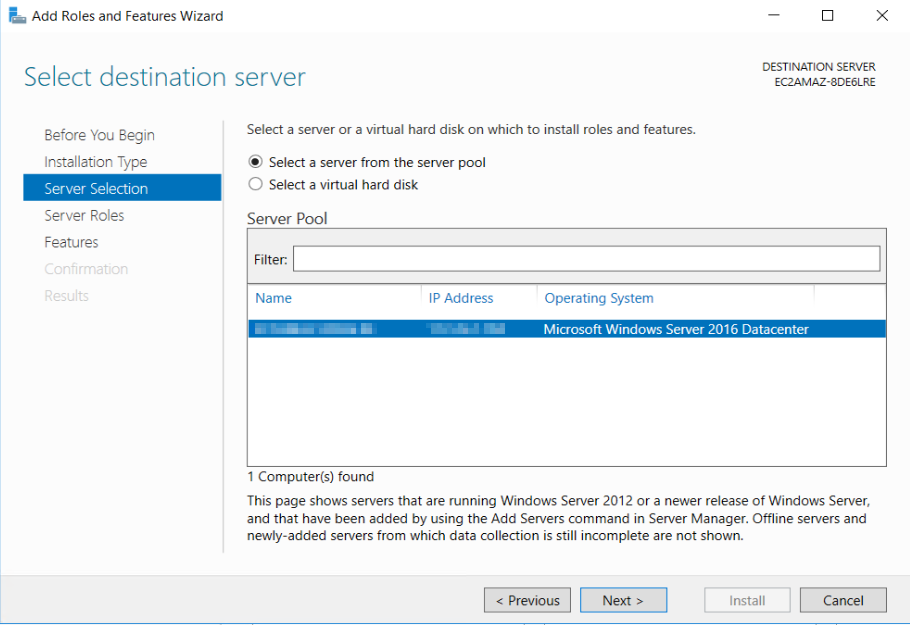
You may have to choose your server from the list.
Next, choose “Active Directory Domain Services” and press Next.
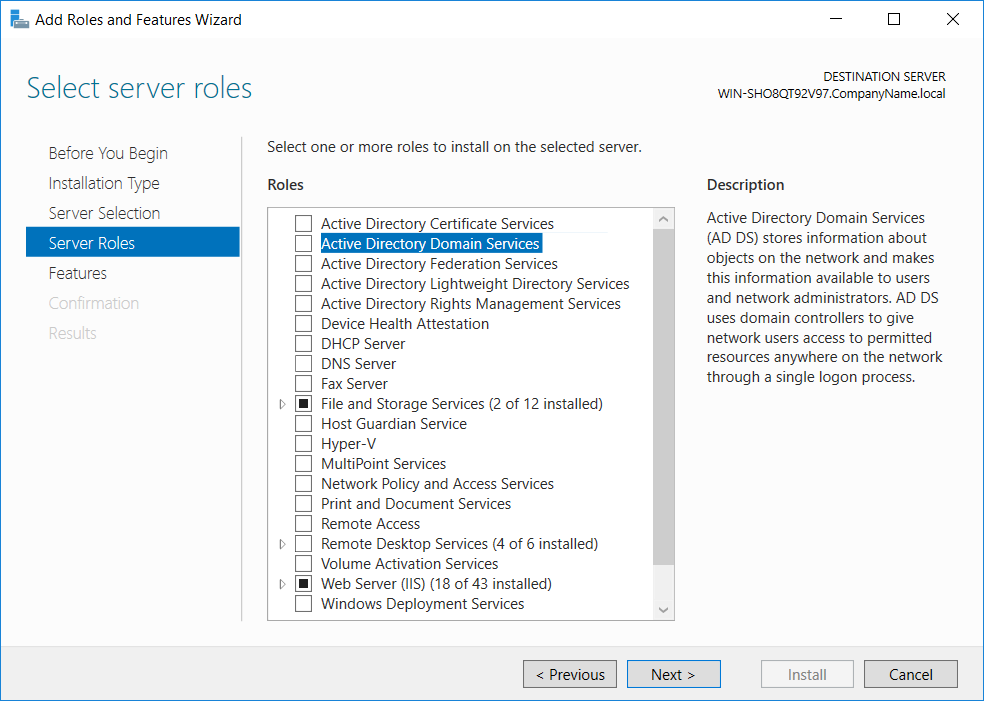
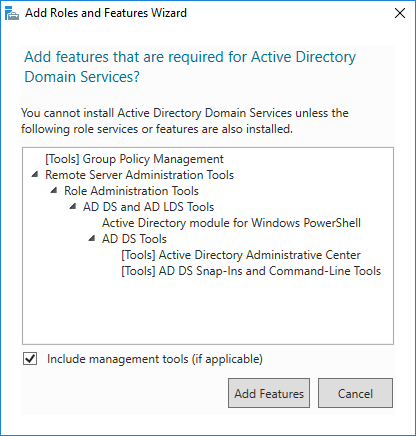
You will be prompted to install dependencies and related tools. Accept the default selection and click “Add Features”
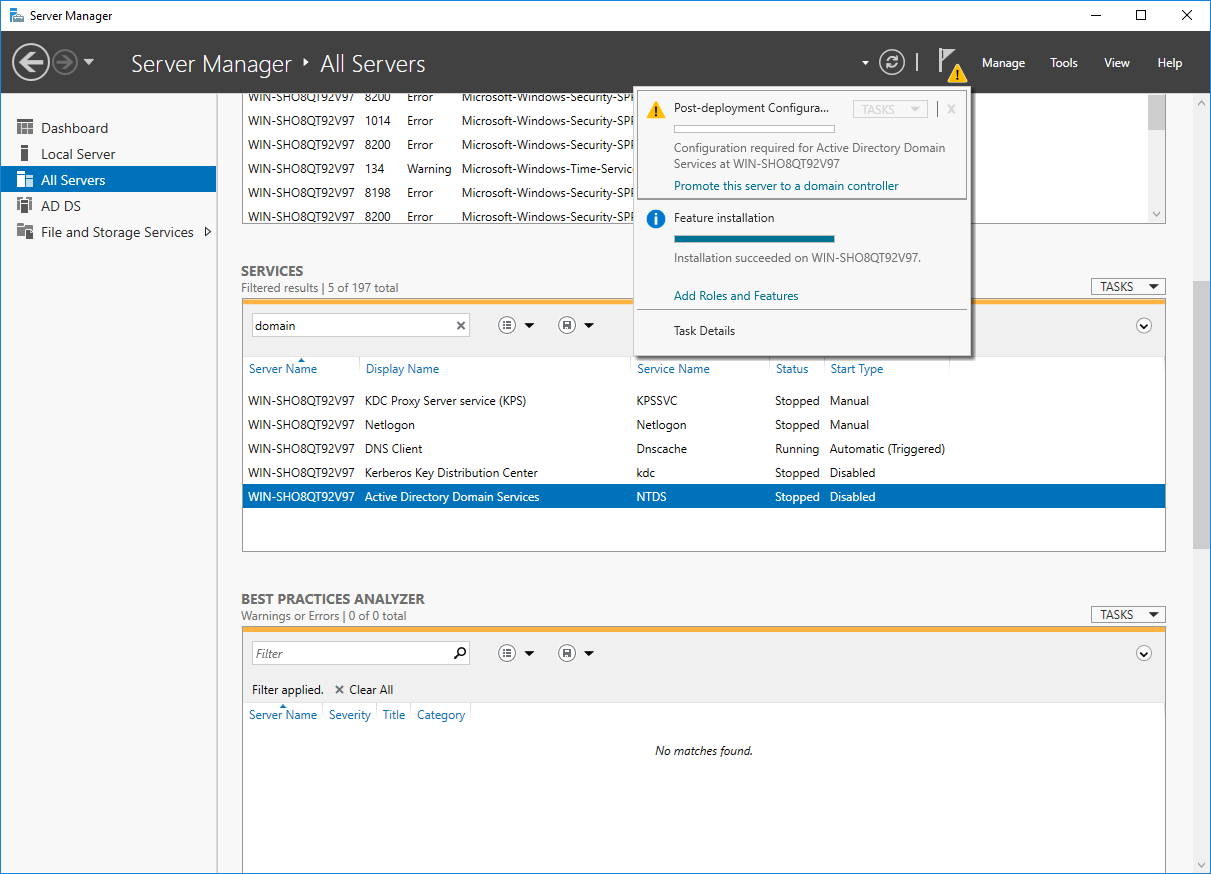
Once the features have been installed, you may notice the flag at the top of the server manager with a notification. If you click it you should see the option to “Promote this server to a domain controller”. Click this notification to begin the process.
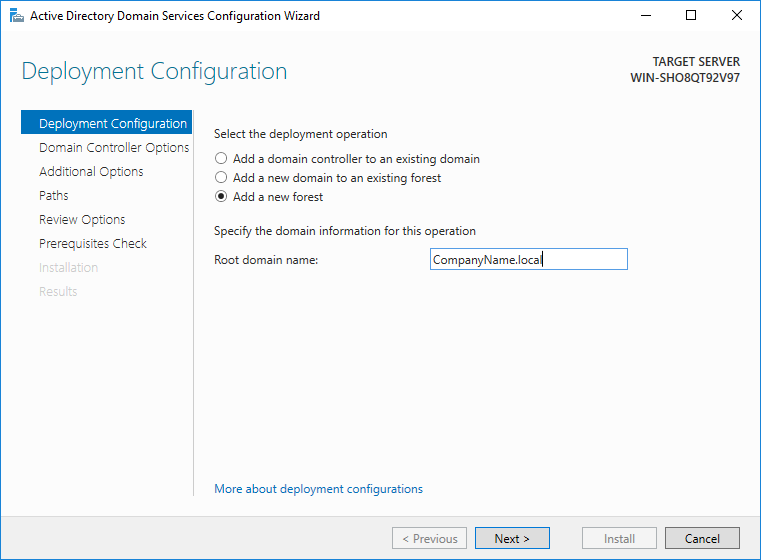
Add a new Active Directory “forest” (i.e. a collection of trees). Choose a root domain name for your domain and press next to continue.
If this is simply a standalone server, choose an unused domain name so that it will not conflict with existing DNS or Active Directory configurations. Please consult with local IT/Network administrators to decide the best setup for this new domain naming scheme.
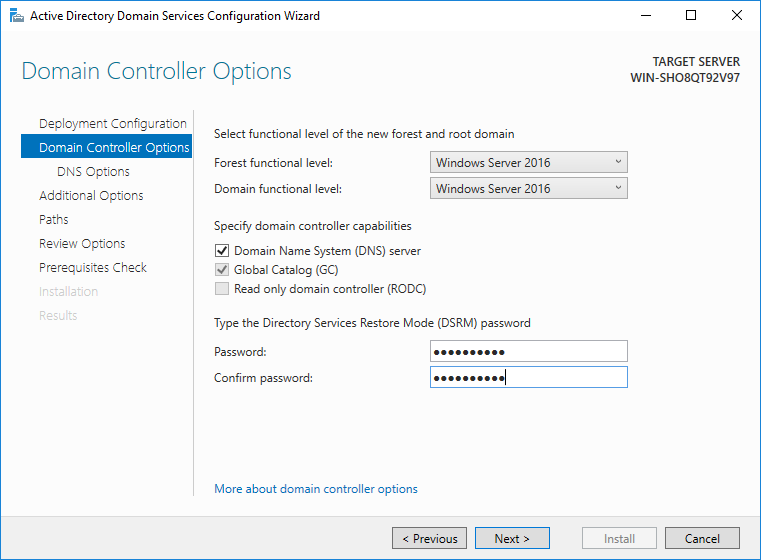
In the next dialog, choose Domain name options to configure a DNS server setup and set a secure password.
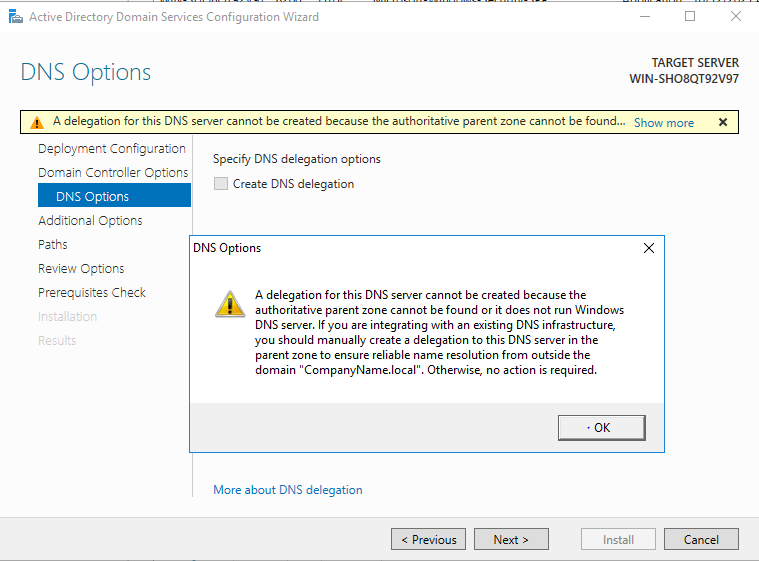
You can ignore the DNS delegation error if you are using a purely internal DNS top level domain such as .local. It is safe to ignore this error and continue. If you have any other concerns about this error, please contact your local IT/Networking administrators.
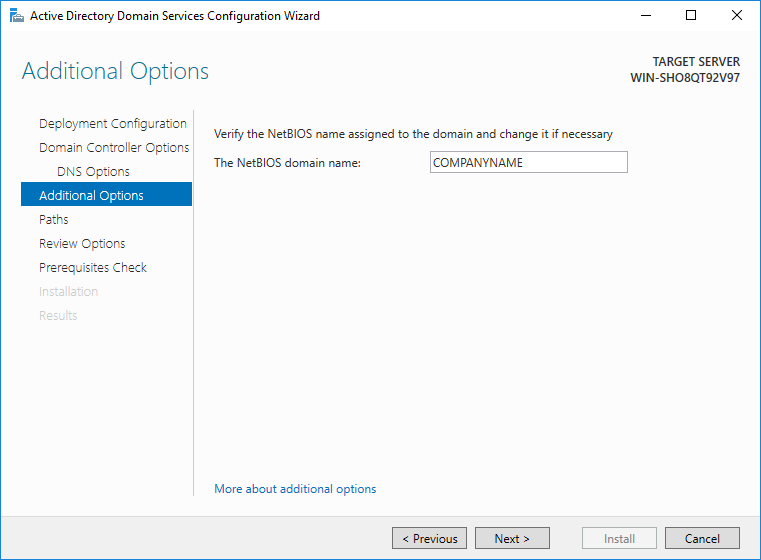
You may set a NETBIOS name, a simplified name that is specific to Windows networking.
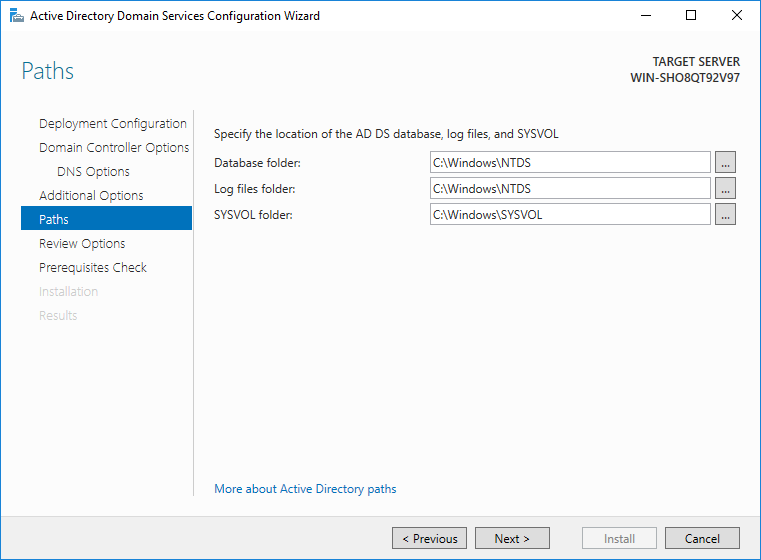
Next, confirm the directory paths to store the database and logs for the Active Directory and click “Next”
Click “Next” to confirm the options on the next dialog, and you should see the prerequisite check screen. You should see the green checkmark both at the top of the screen and at the bottom of the output window. If so, you can click “Install” to proceed. Note that the server will reboot after the successful installation.
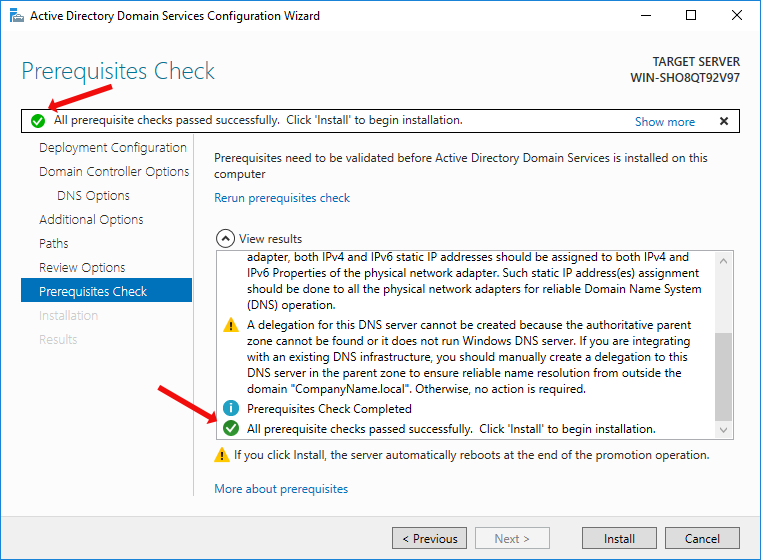
When the server restarts, you can continue to the next step.
Installing Remote Desktop Server and the Management tools
Launch Server Manager if it is not still running and choose “Add Roles and Features”.
In the following Wizards, choose “Remote Desktop Services Installation”

Next, choose “Quick Start”.
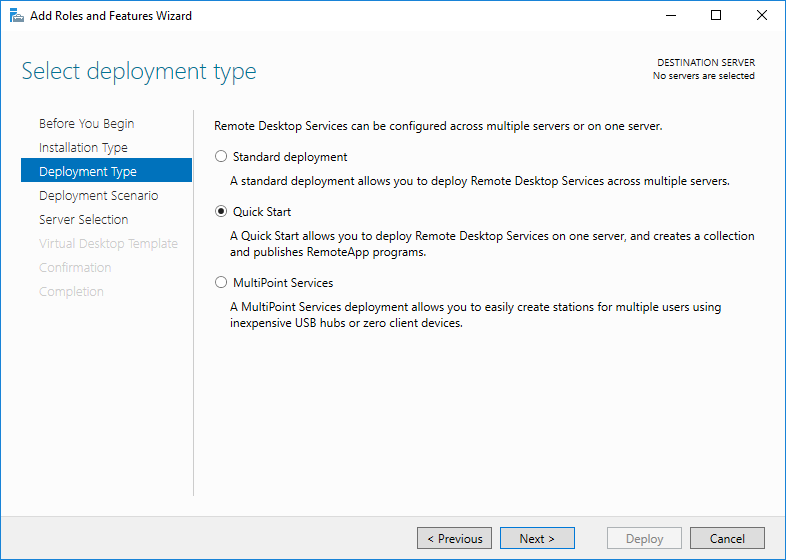
Choose your server in the next dialog if you are prompted.
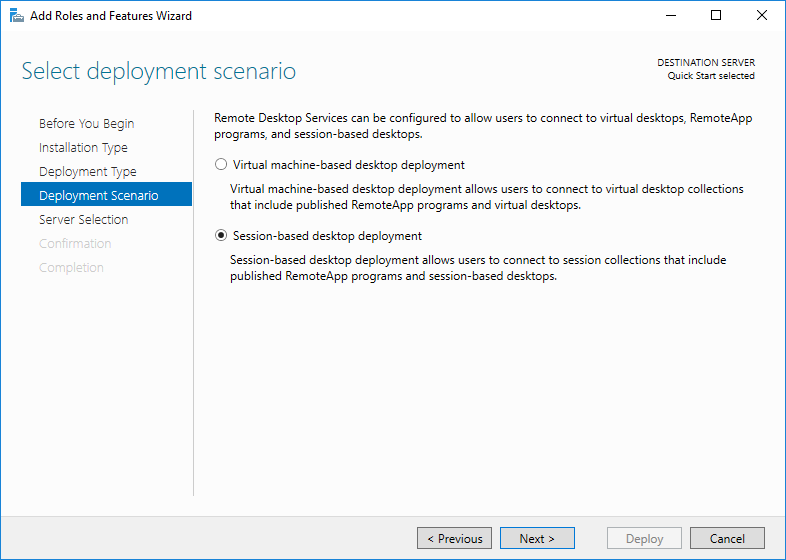
For the deployment scenario, choose “Session-based desktop deployment” and click next.
This next screen will be shown. You should click next, there is nothing extra you need to select.
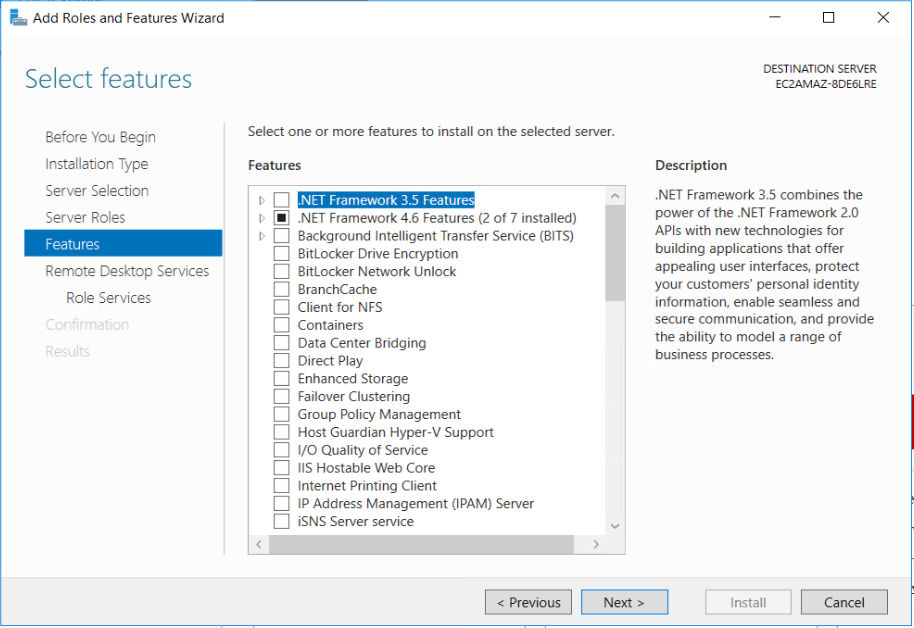
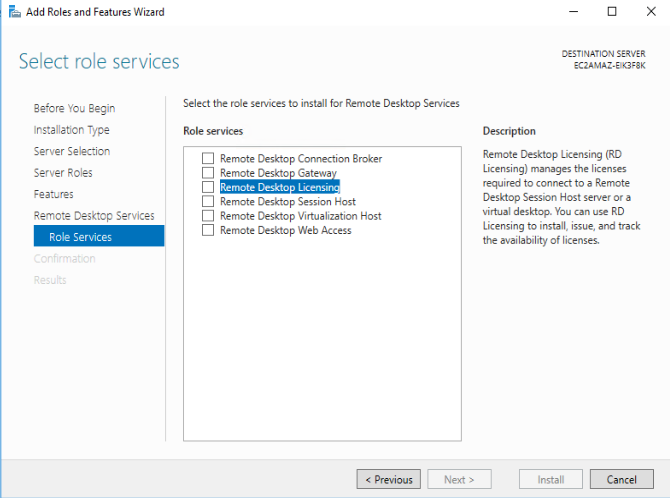
Press Next – you can now select the options to install on the server. Select and check Remote Desktop Licensing.
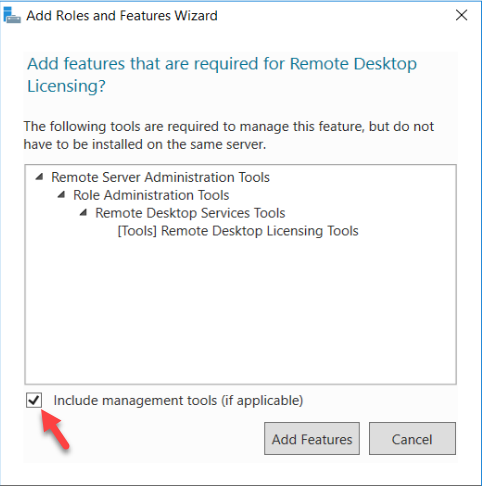
As soon as you select the checkbox, a confirmation screen will show. Be sure to select “Include management tools (if applicable)” and press “Add features”. On the next screen, click “Install”
As mentioned above, you could at this point also install Remote Desktop Connection Broker, and Remote Desktop Gateway. How to set up these services is not described here.
Configuring the RDS License Server
The local Remote Desktop Server will need to access a license server to check its CAL status, and none is configured.
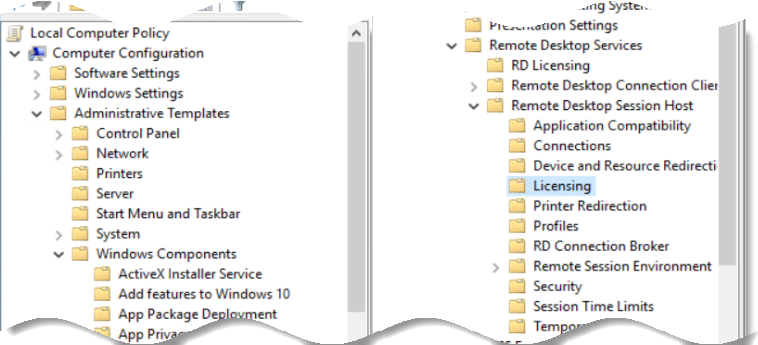
Launch the Windows Local Group Policy Editor by selecting Start – Run and type gpedit.msc
Choose the path:
Local Computer Policy
- Computer Configuration
- Administrative Templates
- Windows Components
- Remote Desktop Services
- Remote Desktop Session Host
- Licensing
- Remote Desktop Session Host
- Remote Desktop Services
- Windows Components
- Administrative Templates
The default licensing settings are unconfigured.
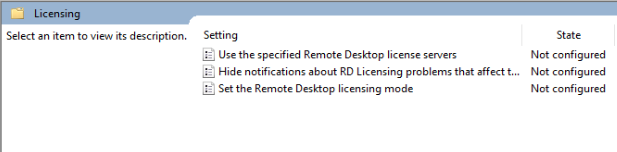
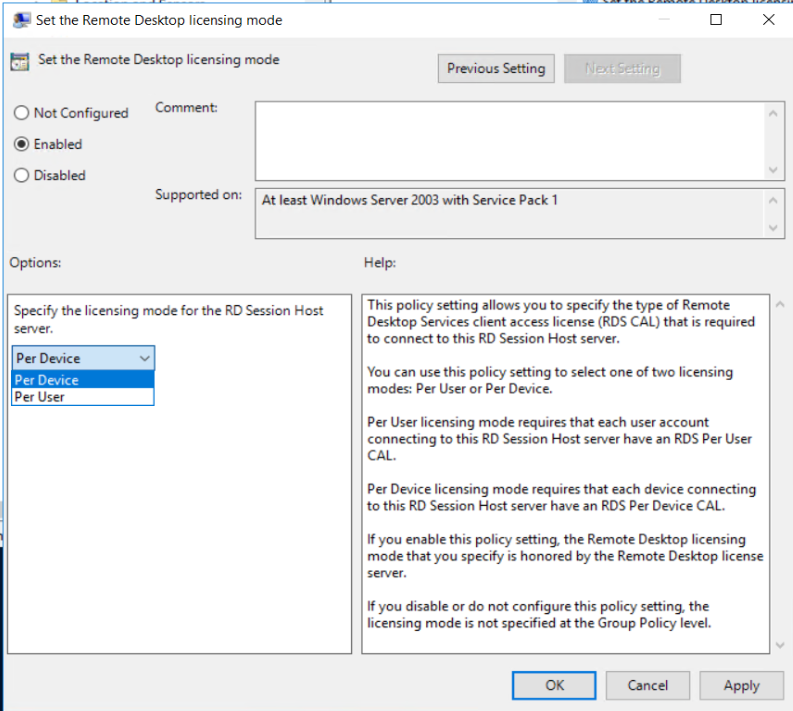
Double-click “Set the Remote Desktop licensing mode”, click “Enabled” and choose whether you have purchased “Per user” or “Per device” licenses. Click Apply and then OK.
Consult Microsoft for the differences between licensing modes. Here is some of their documentation explaining CALs
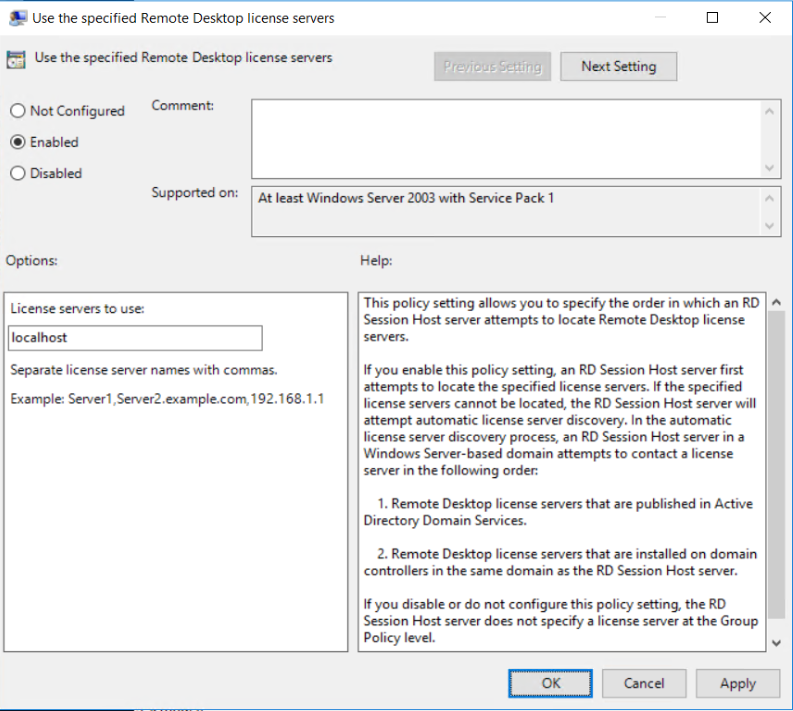
Select “Use the specified Remote Desktop license servers”, click “Enabled” and enter “localhost” for the field “License servers to use”. Click “Apply” and then “OK”.
Now you can install your Remote Desktop Server CALs purchased from Microsoft and the server will use them to allow licensed users to connect.
Installation of AYS and connection to the database
The environment should now be configured for you to install typical applications, such as AYS.
For more information, you can read the following articles for how to install AYS.
Adding users
Adding users can be done using the standard Microsoft methods as described here: Manage User Accounts in Windows Server Essentials. Your server instance version may differ slightly but the principles should be similar.
Backing up a snapshot of the instance
AWS Lightsail has a procedure documented to create a snapshot so you can migrate and deploy this server instance as a template. The snapshot can also be used as a complete server-level backup.
Amazon’s documentation is here: Creating a snapshot of your Windows Server instance in Amazon Lightsail
If you are using the snapshot as a backup, you only need to do step 1 in the linked document. You do not need to run sysprep on your instance.
This process may take 2-3 hours, depending on the size of your instance.
This method can only be used to back up the entire server – including all attached storage, and all restores will entirely replace the server. If you wish incremental backups, you should also consider another backup solution. In addition, the server must be offline to create the snapshot. If you want live, regular image backups you will need to look at another solution.
Restoring a snapshot to a new instance
If you have a failure that requires a complete server restore, you can restore your snapshot to a new server instance. This should be done when you want to entirely replace your server instance.
You should not run your old and newly restored instance at the same time, as it was not prepared with sysprep as described in the Amazon documentation (steps 2 & 3 above). The instances will be identical and likely cause problems when working on the same network.
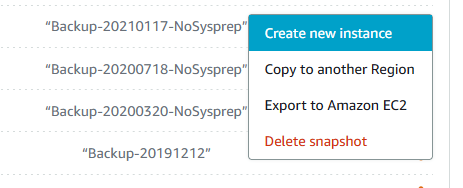
You should first shut down your old instance, then in the Snapshots tab, select the “ellipsis” icon to the right, and choose “Create new instance” from the popup menu. This will begin the process to create a new server instance with the configuration and disk contents based on the time the snapshot of the server was made.
When the restore has completed, you can test that the restore is successful, and if so, delete the previous, unwanted server instance.
Backing up and restoring databases
Managed databases
If using a managed backup option, you can back up the database to a snapshot or roll it back to any point in time using the Lightsail interface.
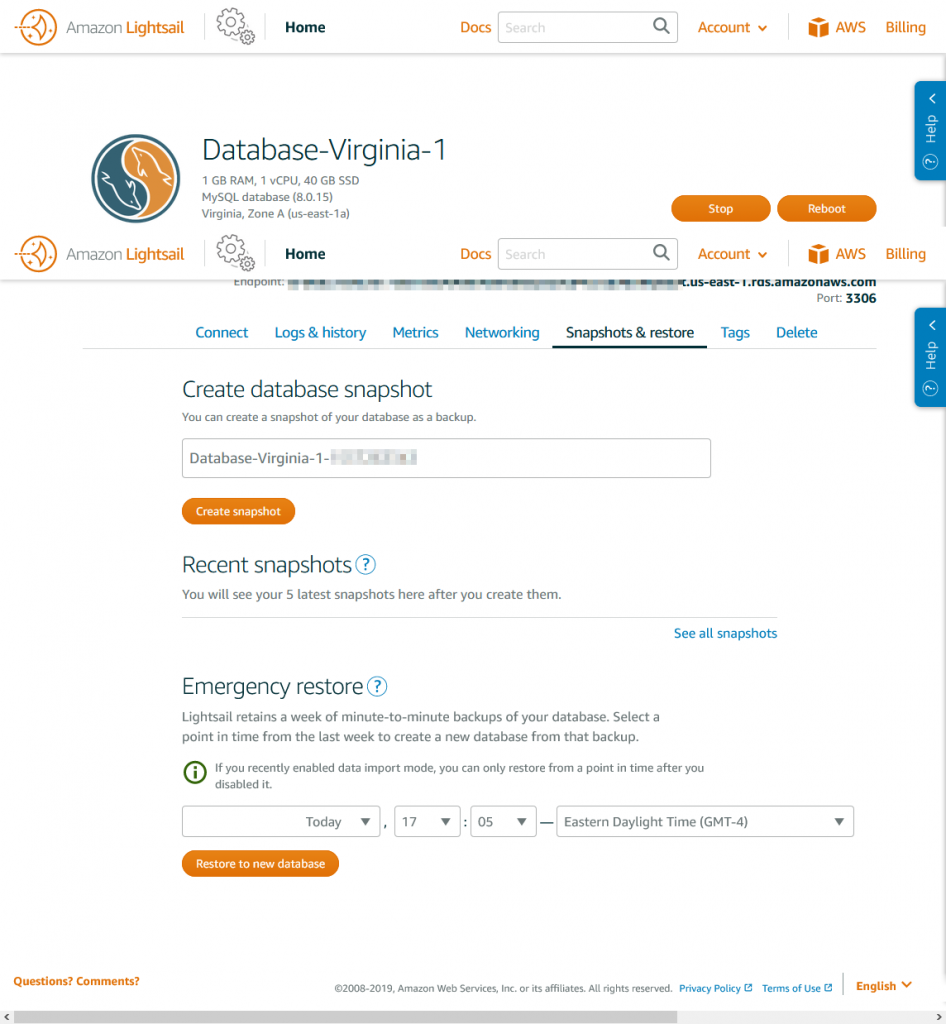
Click the Database instance and select the “Snapshots & restore” tab. Here you can create a one-click snapshot of the entire server. If necessary you can create an entirely new instance from this snapshot (or migrate to a larger instance if your capacity is reached)
You can also roll back your database state to any time within the last week. Choose the time and click “Restore to new database”.
Unmanaged databases
You will need to create your own backup strategy for unmanaged databases using the SQL tools you install on the Windows host machine.
0 people found this article useful
0 people found this article useful