Most modern digital cameras can be tethered to your local computer such that when each picture is taken, the digital photo file is automatically transferred to a target folder on your computer. The AYS program can then automatically attach them to service/repair orders and other records. The following information will assist you in installing and configuring your digital camera to work with AYS.
At Your Service Software, Inc. does not officially support any particular brand of digital camera, smartphone, or cloud storage provider. It is up to you to determine which hardware and software will be most applicable in your particular application. The information provided in this article is intended to provide general direction to assist you in installing and configuring a wide variety of options.
Installing a digital camera that comes with tethering software
Most digital cameras come packaged with tethering software and either a physical tethering cable (e.g. USB) or the ability to tether to a computer using a wireless connection (e.g. Wi-Fi).
Follow the instructions that come with your camera and packaged tethering software to install the software and connect the camera to your computer.
Within the tethering software, you should be able to specify a specific target file folder on your computer to which each digital photo file is copied as it is taken on the camera. Some tethering software will allow all photos to be copied directly to the specified target folder. Some tethering software will allow the ability to automatically create a subfolder structure within the specified target folder, typically a new subfolder each day, and then copy photos to that newly created subfolder.
As you take pictures on the tethered camera, the digital photo files will automatically be copied to the target folder on the local computer. Once configured, the AYS program will remove the picture from that temporary target folder and move it to a permanent storage folder (e.g. a shared folder on your network.)
Support for subfolders within the target folder is only available for AYS licenses of 3.5 and higher.
Configuring a smartphone as a tethered digital camera
Most smartphones (e.g. Android, iPhone) can be configured to act as tethered digital cameras by using commercial cloud storage providers (e.g. Dropbox, Google Drive, OneDrive) that automatically sync photos from the smartphone to a target sync folder on the local computer.
First, create an account with your desired cloud storage provider that will be dedicated to tethering a specific smartphone.
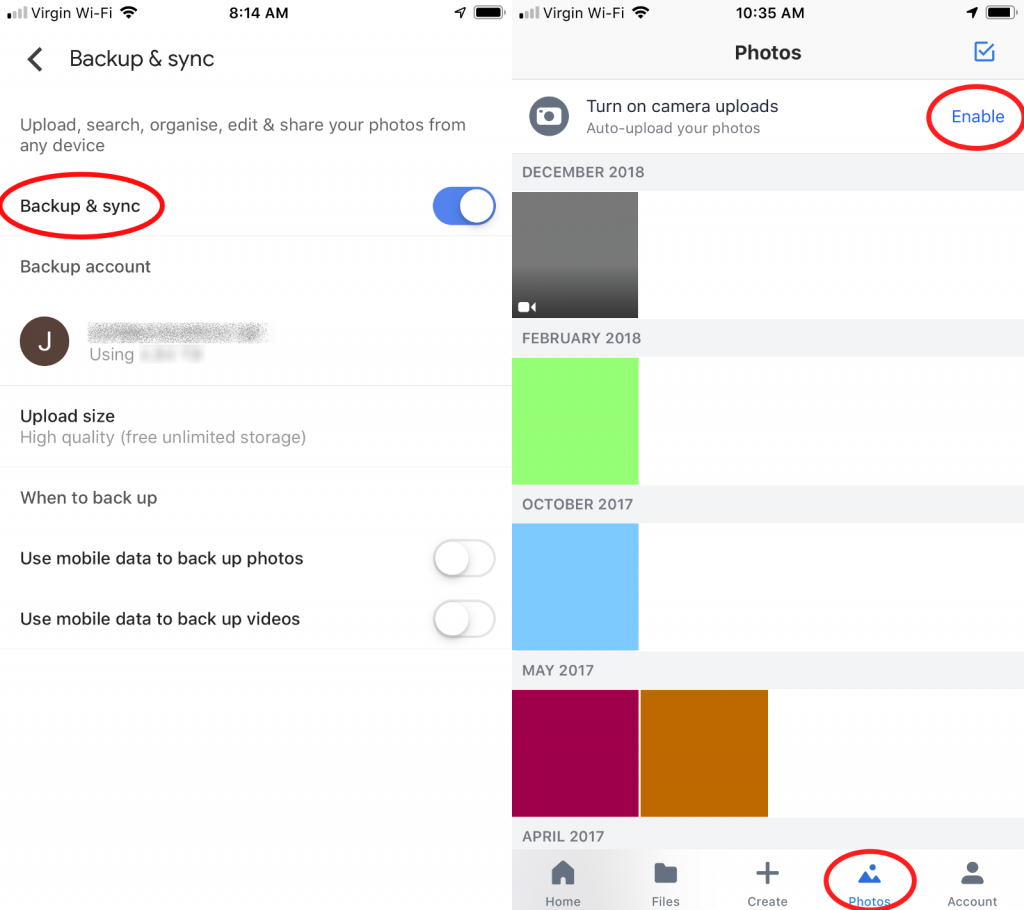
Next, install the cloud storage provider’s app on that smartphone. Within the app’s settings, turn on the option to automatically upload photos as they are taken with the smartphone’s camera. The app will have to given permission to view your local device’s photo library.
Note that the phone’s operating system may terminate the app if it has not been used for a while, so be sure to launch it to make sure syncing is taking place in the background.
Finally, install the cloud provider’s app on your local computer. Configure the app to download your photos, and take note of or specify where the target sync folder is on your local computer.
As you take pictures on the smartphone, the cloud storage provider’s app will automatically copy the digital photo file to the cloud and then sync a copy of it in the target sync folder onto your local computer. Once configured, the AYS program will remove the picture from that temporary target folder and move it to a permanent storage folder (e.g. a shared folder on your network.)
As the file is removed from the target folder on your local computer, the sync process of the cloud provider will also automatically remove it from the cloud.
Configuring AYS to work with tethered digital cameras
Within the AYS program, select Setup > Communication Options from the main menu, and then select the Digital Camera/Scanner tab.
In the Path for Temporary Photos field, enter or select the target folder on your local computer that you configured when setting up your tethered digital camera or smartphone (see above in this article). This folder may be configured uniquely on each physical computer.
In the Path for Permanent Photos field, enter or select the folder to which pictures will be copied and permanently stored once they are actually attached to records in the AYS database. In a multi-user environment, this should typically be a shared folder on your network that all users have access to. This folder setting will be the same for all users.
If the Organize Photos and Scans in subfolders checkbox is not selected then all attached digital photo files will be stored directly in the permanent photos folder. The Windows operating system has a practical limit of about 50,000 files in a single folder before performance significantly degrades. Selecting this checkbox will cause attached photos to be automatically organized in subfolders within the permanent photos folder.
Organizing photos and scans in subfolders is only available for AYS licenses of 3.5 and higher.
Since the AYS program will always attach the most recent digital photo file, older unwanted photos may be left behind in the temporary target folder. Clicking the recycle button to the right of the path for temporary photos will delete any remaining photos from that folder.
Attaching digital photos to AYS records
To attach a digital photo that was taken by a tethered digital camera, open a record within AYS (e.g. repair orders, sales invoices, etc.) and select the Attachments tab. Click the camera button to the right of the attachments area. The most recent photo from the local temporary photo folder will be renamed and moved to the permanent photo folder, and the new name and location will appear in the attachments list. Save the record to complete the attachment process.
To streamline this process for repair orders, the program can be configured to automatically attach the most recent photo (if any) when a new repair order record is saved. To enable this option, select Setup > Module Options from the main menu, and then double-click the Repair Orders branch to expand it. Select the checkbox next to the option Automatically Attach Photograph to New Records, and then save.
0 people found this article useful
0 people found this article useful